Apricot Tart

This is a tart we learned to make in Ivan Day’s Pie Making and Pastry course. Unlike modern recipes, with this one your ingredients are based on how many apricots will fill your tart. It helps to have a scale, but you can manage without one. You do need a nutcracker, though.

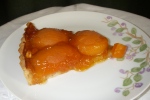
A slice of apricot tart

A slice of apricot tart

I used the pâte sablée recipe from Mastering the Art of French Cooking, but I substituted some almond flour for some of the all-purpose flour and some almond extract for some of the vanilla. Almond is a good complement to apricots, which are related to almonds.

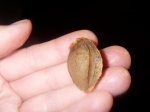
In fact, apricot pits look a lot like almonds, and the seeds, which are edible, smell like almonds when you chop them.

An apricot pit

An apricot pit

Apricot seeds (like almonds) contain amygdalin, which is a precursor to cyanide, but the body quickly processes the amygdalin, so you have to eat a lot of apricot seeds to be in any danger. Bitter almonds contain a lot more amygdalin than apricot seeds do, and you have to eat 4 or 5 dozen of those to incur any risk. I mention this because the recipe calls for using the apricot seeds. I had two slices of the tart last Sunday, and I felt no symptoms of cyanide poisoning.

Apricot Tart
Crust
5 oz all purpose flour
2 oz almond flour
3 Tbl powdered sugar
2½ oz unsalted butter, cut into pieces
1 oz (2 Tbl) vegetable shortening
1 egg
½ tsp almond extract
½ tsp vanilla extract
1 tsp ice water

Filling
about 3 lb of firm apricots
about 1 lb of sugar, probably more

To make the tart shell:
Fit the food processor with the metal blade. Add the dry ingredients and process to combine. Add the butter and shortening and process until the mixture looks like coarse cornmeal. Add the egg, extracts, and water and process until the dough comes together, about 30 seconds.

Remove the dough from the work bowl and roll it out on a flour-dusted surface. Transfer the dough to an 11-inch tart pan and press it into the bottom and sides. The sugar makes this dough pretty fragile, and you might find it easier to forgo the rolling and just press the dough into the tart pan.

Line the shell with foil and distribute weights over it. Chill the shell in the freezer or refrigerator while you preheat the oven.

Preheat the oven to 375℉. Bake the shell for 15 minutes. Remove the shell from the oven and, lifting the foil by the corners, remove the foil and weights from the shell. Return the shell to the oven and bake for another 5 minutes. Set the shell aside to cool.

To make the filling:
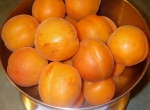
Buy enough apricots to fill your tart tin. For an 11-inch tin, you’ll need 18 to 20 apricots, about 3 pounds.

3 pounds of apricots

3 pounds of apricots

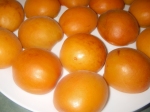
Cut the apricots in half. Put the prettier half face down on a large plate.

Apricot halves resting on a plate

Apricot halves resting on a plate

Put the less-pretty half in a large nonreactive saucepan. I set my saucepan on my scale. Weigh the apricot halves in the saucepan and weigh out 3/4 of that amount in granulated white sugar. My apricot halves weighed 1 lb 6¾ oz, so:

16 + 6.75 = 22.75
22.75 × 0.75 = 17.0625

or about 17 ounces of sugar.

If you don’t have a scale, you have to know the weight of the apricots. If you bought them at a supermarket, the receipt should give you the weight. If you bought them at the farmer’s market, make sure you remember the weight. (If you picked them from your own tree, you’ll have to guess.) The pits don’t weigh much; my pits weighed 2 oz. Divide the total weight by 2 and then round down to get the weight of the cooked apricots, then multiply that by 0.75.

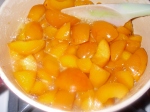
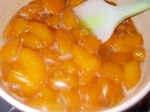
Set the pits aside. Put the saucepan with the apricots over medium heat and cook them until they start to exude their juice.

Apricots cooking. You don't have to cut them up, but I did a little.

Apricots cooking. You don't have to cut them up, but I did a little.

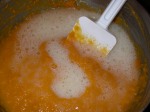
At that point, pour in the sugar and stir until the sugar dissolves in the apricot juice. Eventually this will be apricot jam, which is part of the tart filling.

Apricots with sugar stirred in

Apricots with sugar stirred in

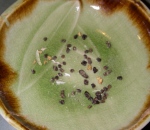
While the jam is cooking, crack the apricot pits (if you can, several of mine were too hard to crack) and remove the seeds.

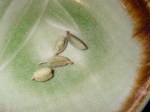
Apricot seeds. Some were crushed when the  shell cracked.

Apricot seeds. Some were crushed when the shell cracked.

Chop the seeds and set them aside.

Chopped apricot seeds

Chopped apricot seeds

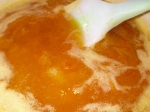
As you’re working on cracking the pits, keep an eye on the jam and stir it from time to time. The jam will be done in 30 to 60 minutes; mine took about 45 minutes. It’s done when there are no identifiable pieces of fruit (you’ll see pieces of apricot skin, which is fine) and the jam is quite thick and not runny.

Apricot jam done

Apricot jam done

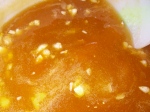
Stir in the chopped apricot seeds and set the jam aside to cool a little.

Jam with chopped seeds stirred in

Jam with chopped seeds stirred in

Preheat the oven to 350℉.

Spread some of the jam over the bottom of the shell. Arrange the remaining apricot halves, cut side down, in the cooled tart shell. Spoon in the rest of the jam, making sure you fill all the spaces.

Assembled and ready to bake

Assembled and ready to bake

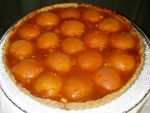
Bake the tart for 30 to 40 minutes or until the apricots are tender when you stick a sharp knife in them.

The baked tart

The baked tart

Cool the tart on a rack. When it’s cool enough to handle, remove the tart from the tin. This tart serves 8 to 12 if you’re willing to share.

Leave a comment

Filed under fruit, tart

Red, White, and Blue Bombe

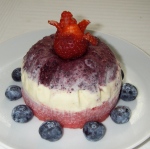
The other day on Facebook, the folks at King Arthur Flour suggested making strawberry sorbet. It sounded good, so I made sure to get some strawberries at the supermarket. Then I thought, why stop there? For Independence Day, a red, white, and blue bombe would be fun: A batch of strawberry sorbet, the same recipe but with blueberries, and a batch of vanilla ice cream layered in little molds.

Red, white, and blue bombe for Independence Day

Red, white, and blue bombe for Independence Day

For the sorbet, I pretty much followed the KAF recipe, but I made double the syrup and used half for the strawberry and half for the blueberry. Then I made Chef Bo’s vanilla ice cream base, which turned out better than any ice cream base I’ve ever made. I have the Cuisinart Ice-20 machine, which everyone recommends. (Actually, Cuisinart has a newer version, Ice-21, now.) The drawback is that you have to plan ahead and get the freezer bowl in the freezer well in advance, like 24 hours; alternatively, you can just leave it in the freezer all the time if you have enough room in your freezer, which I usually don’t.

Churned Berry Sorbet
adapted from the KAF recipe
2 cups water
14 ounces sugar
7½ ounces light corn syrup
1 quart fresh strawberries
24 oz fresh blueberries
4 oz lemon juice

Mix the sugar and water in a sauce pan and bring it to the boil over medium heat. Wash down the sides of the pan so the sugar doesn’t fall in later and recrystallize the sugar in the syrup. When the syrup comes to the boil, add the corn syrup. Boil the syrup for about 5 minutes. Store the syrup in the refrigerator until you’re ready to use it.

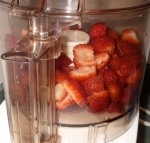
Clean and hull the strawberries; cut them up if they’re large, as the ones from the supermarket tend to be. Put them in the food processor with 2 oz of the lemon juice and puree them.

Strawberries ready to be pureed

Strawberries ready to be pureed

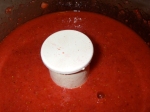
If you want your sorbet to be smooth and uniform, strain the puree to remove the seeds and larger bits of fruit. I kind of like the rougher look and texture, so I didn’t strain mine.

Strawberry puree

Strawberry puree

Wash the blueberries, remove any stems, and puree them with the other 2 oz of lemon juice. Mix each puree with half the syrup; I got 24 oz of syrup, so 12 oz of syrup for each puree. Chill both purees; the churning goes faster if the ingredients are cold.

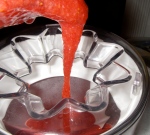
When the freezer bowl is frozen and the ingredients are good and cold, set up the machine, turn it on, and pour in one of the purees.

Adding the sorbet mixture with the freezer running

Adding the sorbet mixture with the freezer running

If everything’s really cold, you might be able to clean the freezer bowl and make the other batch of sorbet immediately. However, you should probably clean the freezer bowl and put it back in the freezer for a few hours first.

Vanilla Ice Cream Base
adapted from the recipe in The Professional Pastry Chef
1 vanilla bean
1 quart half and half
10 oz sugar
10 egg yolks
2 teaspoons vanilla extract

Split the vanilla bean lengthwise, scrape out the seeds, and put the seeds and pod in a large saucepan. Add the half and half and bring it to the scald over medium heat. Meanwhile, in a medium bowl, whisk the sugar and yolks until they’re smooth and lemon-colored. When the half and half reaches the scald, slowly pour it into the egg mixture, stirring the egg mixture (not whisking) constantly. Return the custard to the saucepan and cook it over medium heat, stirring constantly, until the custard reaches 180℉. Immediately remove the saucepan from the burner. Strain the custard into a clean container and stir in the vanilla extract. Age the custard for at least 8 hours in the refrigerator. Aging improves the flavor and texture of the ice cream.

Once the ice cream base is aged, process it in the ice cream freezer. My machine doesn’t have anything like enough room for the whole batch of base, so I only churned 2 cups of base to start with.

If you have little molds for pudding or Jello, you can layer the sorbets and ice cream to make a bombe. The molds I wanted to use were too short for the bombe I had in mind, but it turns out they’re the same diameter as my English muffin rings, so I extended the molds with those. I put a layer of blueberry sorbet in the bottom of the mold and let that freeze for an hour. Then I added a layer of vanilla ice cream and let that freeze for an hour. Then I stuck an English muffin ring on the mold to hold the layer of strawberry sorbet and let that freeze for an hour.

To get the bombe out of the mold, dip the mold in a dish of hot water for about 10 seconds. Wipe off the wet mold so you don’t drip water everywhere. Turn the mold over a plate and, using the tip of a paring knife,  encourage the bombe to come out of the mold. At this point, I find the ice cream needs to be tidied up a bit and put back in the freezer for a few minutes.

A scoop of each sorbet and the vanilla ice cream in a bowl would also be pretty and festive.

References

Friberg, Bo: Vanilla ice cream custard. In The Professional Pastry Chef. New York: John Wiley, 2002, pp 734-735.

King Arthur Flour: Strawberry sorbet. Available at http://www.kingarthurflour.com/recipes/strawberry-sorbet-recipe

Leave a comment

Filed under ice cream

Happy Tau Day!

Today, 6-28, is Tau Day. Who knew? Tau is like pi: Pi (π) is the ratio of a circle’s circumference to its diameter; tau (τ) is the ratio of a circle’s circumference to its radius. The radius is half the diameter, and τ has only half as many legs as π. Pi, briefly, is 3.14; Pi(e) Day is celebrated on March 14 with pie. Tau, briefly, is 6.28, so I thought I’d celebrate with a τarτ.

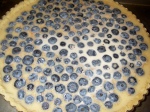
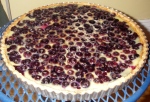
Coincidentally, yesterday in the Serious Eats newsletter there was a slideshow about spices to use with fruit. Apparently, aji panca is just the thing to perk up blueberries. Aji panca is a chili pepper, and I find chili peppers painful to eat. However, you can temper the heat with dairy, so my Tau Day tart is blueberry custard tart with aji panca.

Aji panca, if you can find it, is available as fruit, paste, and powder. I got aji panca powder at Christina’s in Inman Square. They had a good-sized jar for $3.27. You can find aji panca in stores that carry Peruvian groceries, and Amazon has it in all three forms.
A jar of aji panca powder from Christina's

A jar of aji panca powder from Christina's

Blueberry Custard Tart with Aji Panca
Pâte Sucrée Crust
7 oz all-purpose flour (about 1½ cups by the spoon-and-sweep method)
3 Tablespoons granulated sugar
1/8 teaspoon baking powder
1 oz (2 Tablespoons) cold vegetable shortening
2½ oz (4 Tablespoons) cold butter cut into chunks
1 egg
1 teaspoon vanilla
1 teaspoon cold water

In a food processor fitted with the metal blade, pulse the flour, sugar, and baking powder to combine. Add the shortening and butter and pulse until the mixture resembles coarse cornmeal. Add the egg, vanilla, and water, and pulse until the dough comes together into a ball.

Roll out the dough and fit it into a 10-inch tart pan. (You could also use a 9-inch pie plate.) Put the tart shell in the freezer (or refrigerator) until you’re ready to fill it.

Preheat the oven to 375℉.

Blueberry Custard Filling
⅔ cup sugar
½ teaspoons aji panca powder
2 eggs
8 oz (1 cup) whole milk
1 pint (maybe a little more) fresh blueberries (1½ to 2 pints if you’re using a 9-inch pie plate)

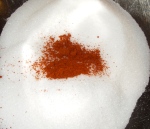
Whisk together the sugar and aji panca powder.

Sugar and aji panca powder (not whisked together)

Sugar and aji panca powder (not whisked together)

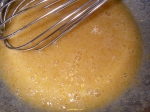
Whisk in the eggs.

Eggs whisked in

Eggs whisked in

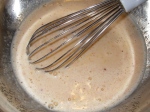
Whisk in the milk.

Milk whisked in

Milk whisked in

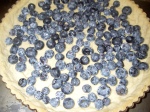
Distribute the berries over the tart shell.

Blueberries distributed in the tart shell

Blueberries distributed in the tart shell

That 1 pint didn’t quite cover the shell, so I added more from a second pint. (You don’t need to cover the shell, though.) Pour the custard over the berries.

Custard added

Custard added

Bake at 375℉ for 15 minutes. Turn the temperature down to 325℉ and continue baking until the custard is set but still jiggles in the center, about another 45 minutes.

Cool the tart on a rack.

Tart cooling on a rack

Tart cooling on a rack

Remove the tart from the pan. Serve and enjoy.

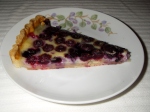
A slice of tart

A slice of tart

I found the aji panca gave the tart a little nip, the way cinnamon does when you use the right amount, without tasting like hot pepper. Possibly it could take 1 teaspoon because the milk takes the edge off the pepper. It would be interesting to see how it works (instead of cinnamon) in a regular blueberry pie.

Leave a comment

Filed under spices, tart

Marshmallows

Marshmallows don’t grab me, but just for fun I tried making them in December using King Arthur Flour‘s recipe and sent them with the rest of the Christmas treats, and people loved them. When we made them in school, I sent them to my aunt and cousin, who thought they were wonderful. They’re pretty easy, and you can make them as fancy as you like.

You want a thermometer for the sugar syrup; any kitchen thermometer will do, but a candy thermometer is the most convenient kind. A thermometer is helpful because you’re cooking the sugar to the soft ball stage. That means if you drop some of the syrup into water, you can form it into a ball with your fingers, and the ball will stay soft. If you don’t have a thermometer, you can test the sugar this way.

Marshmallows are basically meringue with gelatin. Originally marshmallow was made with the sap of the marshmallow plant; the ancient Egyptians mixed marshmallow sap with honey and ate it as candy. The French mixed it with meringue and rose water and whipped it, which produced a confection similar to what we have now. Making marshmallows from marshmallow sap is expensive and labor intensive, though, and good luck finding marshmallow sap. The French figured out that you could use gelatin instead of marshmallow sap, and here we are.
The recipe I’m using is for one big batch, but I want to make several kinds, so I’m dividing it into three small batches. The basic game plan goes like this:

  • Sprinkle the gelatin over water to bloom it.
  • Mix sugar, water, and corn syrup in a saucepan and put that on the heat.
  • Whip the egg whites on high to soft peaks, then turn down the mixer to low until the sugar is ready.
  • When the sugar is ready, stir in the gelatin, then pour that over the whites and make marshmallow.
  • Spread the mixture to cool and set, then cut it into pieces and toss them in powdered sugar.

If you’ve made Italian meringue, you can see this is basically the same thing except with gelatin.

Marshmallows
9 egg whites
4 packets gelatin powder
1 cup water to bloom the gelatin
30 oz sugar
12 oz water to cook the sugar
6 oz corn syrup
flavoring to taste
food color
½ cup each confectioner’s sugar and corn starch, sifted and whisked together to dust the pan and the marshmallows

You’ll also need a sheet pan or baking pan, a sieve or shaker for the confectioner’s sugar mixture, and a thermometer. Use a bigger saucepan than you think you need because when you add the gelatin to the sugar, the sugar will bubble up.

I’m making three kinds, so I’m making a third of this at a time, which is what you see in the photos.

Bloom the gelatin in the 1 cup of water.

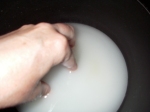
Sprinkle the gelatin over the water to bloom it.

Sprinkle the gelatin over the water to bloom it.

Add the sugar to the saucepan, pour the water over it, and swish the sugar around to make sure it’s all wet.

Swish the sugar around with your hand to make sure it's wet.

Swish the sugar around with your hand to make sure it's wet.

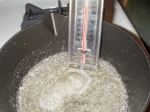
Add the corn syrup to the saucepan. If you’re using a candy thermometer, hook that onto the saucepan. Set the burner for medium heat.

Put the egg whites in the bowl of a stand mixer fitted with the whisk. Whisk the whites on high speed until they form soft peaks, then turn the speed down until the sugar is ready.

Cook the sugar to 240℉.

When the sugar reaches the soft ball stage—240℉ on the thermometer—turn off the heat and stir in the bloomed gelatin. The sugar will foam up, so watch out.

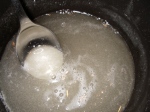
Stir the bloomed gelatin into the hot syrup.

Stir the bloomed gelatin into the hot syrup.

Turn the stand mixer up to medium and slowly pour in the sugar. (The hot sugar cooks the egg whites.)

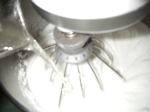
With the mixer running on medium speed, slowly pour in the sugar syrup.

With the mixer running on medium speed, slowly pour in the sugar syrup.

Continue mixing on medium until the bowl of the stand mixer feels only warm to the touch. While you’re waiting, you can set up the pan that will hold the marshmallow. I put a sheet of parchment paper in a sheet pan and sprinkle that with the powdered sugar mixture. Alternatively, you can spray a sheet pan or baking pan with pan spray.
I use a sheet pan lined with parchment paper, and I sprinkle the parchment with the powdered sugar and corn starch mixture.

I use a sheet pan lined with parchment paper, and I sprinkle the parchment with the powdered sugar and corn starch mixture.

When the mixing bowl is warm to the touch, you can add flavoring and food color if you like. For the full batch, you probably want about 1 Tablespoon of flavoring unless you’re using very intense flavoring. When the bowl of the stand mixer feels lukewarm, you can pour the marshmallow onto the pan to set. Smooth the marshmallow as well as you can.

Pour the marshmallow into the prepared pan and smooth it out as well as you can.

Pour the marshmallow into the prepared pan and smooth it out as well as you can.

Then sprinkle the marshmallow with the powdered sugar and corn starch mixture, cover the pan, and let the marshmallow set. Give it at least 5 or 6 hours; overnight is better.

Dust the marshmallow with powdered sugar and corn starch.

Dust the marshmallow with powdered sugar and corn starch.

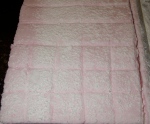
When the marshmallow is set, you can cut it into squares with a knife or a pizza wheel. You can also cut it into shapes with aspic cutters or small cookie cutters.

When the marshmallow is set, cut it into pieces.

When the marshmallow is set, cut it into pieces.

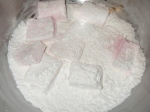
Toss the marshmallows into a bowl with the powdered sugar and corn starch mixture.

Toss the marshmallows with the powdered sugar and corn starch mixture.

Toss the marshmallows with the powdered sugar and corn starch mixture.

Try not to eat them all in one sitting.

Marshmallows flavored with rose water and colored pink

Marshmallows flavored with rose water and colored pink

Leave a comment

Filed under confections, marshmallows

Baklava

In a fit of idiocy (or a spirit of adventure, I’m not sure which) I volunteered to make a traditional baklava to take to class tonight. I’ve never made one, so that’s why I volunteered.

Baklava isn’t hard, but it’s sort of fiddly and a little time consuming. I spent less than an hour in hands-on time, so it’s not really a time sink. The syrup needs to be cooled when you pour it over the pastry, so I made that first and let it simmer while I assembled the baklava. The syrup simmers for 25 minutes, and its time was up before I was finished getting the pastry together; I just took it off the flame and let it sit there. Getting the pastry together took about 35 minutes, and all the hands-on time including getting out the ingredients through putting the baklava in the oven was about 45 minutes.

The leaves are very thin and fragile, and they dry out quickly. Everyone says you need to unroll the leaves and cover them with a damp towel, then take one leaf at a time and immediately re-cover the leaves. It’s true. The leaves feel a little like fabric, and they tear easily.

One leaf of phyllo

One leaf of phyllo

I decided even before I got started that I wasn’t going to worry if they tore or didn’t lie smoothly. You can cut the leaves to fit (which I wouldn’t do if you paid me), let the edges hang over the edge of the pan and fold them in later (which I did), or arrange the leaf to more or less fit into the pan (which I’ll do next time and see what happens). The leaf sticks to the butter on the leaf below it, so buttering them isn’t hard, but buttering the one that covers the nut mixture is a little tricky because there’s no butter for the leaf to stick to.

Baklava is one of those things you know when you see it (or taste it), but there’s no one standard recipe. I found a bunch of different ones on the Web and this one is an amalgam of several of them. It turned out pretty well! Alton Brown has one that calls for three kinds of nuts (walnuts, almonds, and pistachios) and rosewater to spritz them. That looks good, and now that I see how cheap phyllo dough is ($2 for a 1-lb package!), I’ll try that one next.

Baklava

For the syrup
12 oz (1 cup) honey
5¼ oz (2/3 cup) water
2 tsp lemon juice
1 small cinnamon stick
seeds from 4 whole green cardamom pods

Green cardamom pods

Green cardamom pods

Cardamom seeds (and a little pod debris)

Cardamom seeds (and a little pod debris)

For the pastry
2 cups chopped walnuts
4 oz (½ cup) sugar
1 tsp cinnamon
1 lb phyllo dough, thawed (a 1-lb package contains about 20 leaves)
8 oz (2 sticks) butter, melted

1 pound of phyllo dough

1 pound of phyllo dough

Equipment: 9″ × 13″ baking dish; pastry brush
Makes 36 pieces (if you cut the pastry better than I did)

Method
1. Preheat the oven to 400°F.
2. Get the syrup started.
3. While the syrup is cooking, assemble the baklava and put it in the oven.
4. When the syrup is cooked, strain it and set it aside to cool.
5. When the baklava is done, set it on a rack to cool for 10 minutes, then pour the syrup over it.
6. Allow the soaked baklava to cool completely before serving.

To make the syrup
1. Combine the honey, water, lemon juice, cinnamon stick, and cardamom seeds in a small saucepan.
2. Bring to a boil and simmer for 25 minutes.
3. Strain into a bowl or pitcher and set aside.

To make the pastry
1. Combine the nuts, sugar, and cinnamon in a bowl and set aside.
2. Brush the baking pan with melted butter.
3. Lay a sheet of phyllo dough in the baking dish and brush it with butter. Repeat this step for a total of 5 sheets.

First leaf of phyllo in the baking dish

First leaf of phyllo in the baking dish

First leaf of phyllo brushed with melted butter

First leaf of phyllo brushed with melted butter

4. Spread about 1/3 of the nut mixture over the dough.
5. Repeat step 3 and spread half the remaining nut mixture over the dough.
6. Repeat step 3 and spread the rest of the nut mixture over the dough. Repeat step 3.
7. Cut the pastry lengthwise into 5 strips about 2 inches wide.

Assembled baklava sliced into 4 strips vertically; I should've slice it into 5 strips

Assembled baklava sliced into 4 strips vertically; I should have sliced it into 5 strips

8.  Cut on the diagonal into 9 strips about 2 inches wide.

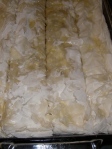
Baklava cut also on the diagonal and in the oven

Baklava cut also on the diagonal and in the oven

9. Bake at 400°F for 30 to 35 minutes or until the dough is golden.

Baked baklava cooling

Baked baklava cooling

To assemble
1. Cool the baklava for 10 minutes.
2. Pour the cooled syrup over the baklava.
3. Let the baklava cool before serving.

Baked baklava soaked with syrup

Baked baklava soaked with syrup

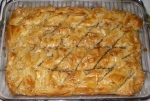
This was pretty good. It’s very sweet, but baklava is very sweet, so I think I did it right.

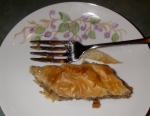
A serving

A serving

1 Comment

Filed under baklava

Abby Fisher’s Sweet Potato Pie

In a food history class, we got this recipe for sweet potato pie. This has orange juice and zest in it, and the class demo pie was delicious.

Sweet potato pie cooled

Sweet potato pie cooled


Abby Fisher was born into slavery in 1832 in South Carolina. In the 1870s, she and her husband moved to San Francisco, where they made pickles. She did catering for wealthy San Francisco and Oakland society, and someone urged her to write a cookbook. One problem: In her youth, she had not been allowed to learn to read or write. She dictated the recipes, and What Mrs. Fisher Knows About Old Southern Cooking was published, but eventually it was forgotten. It was discovered by a librarian and is now available as a facsimile edition.

Until the late 19th century, recipes were written in paragraphs, just as you might tell someone how to make the dish (which, of course, is what Mrs. Fisher was doing in her cookbook). The original recipe looks like this:

Sweet Potato Pie.
Two pounds of potatoes will make two pies. Boil the potatoes soft; peel and mash fine through a cullender while hot; one tablespoonful of butter to be mashed in with the potato. Take five eggs and beat the yolks and whites separate and add one gill of milk; sweeten to taste; squeeze the juice of one orange, and grate one-half of the peel into the liquid. One half teaspoonful of salt in the potatoes. Have only one crust and that at the bottom of the plate. Bake quickly.

(A gill is half a cup; “cullender” was a standard spelling for colander.)

You need to plan ahead for this one. One efficient way to organize it is to preheat the oven to 400℉, scrub the potatoes and put them on a baking sheet, then get the pie dough made. By the time the dough is ready to rest in the fridge, the oven is preheated and you can pop the potatoes in. When the potatoes are done, leave the oven on and set the potatoes aside to cool a little bit so you can handle them. Roll out the pie dough, line the pie plate, and stick that in the fridge. Then make the filling and get the pie in the oven. This will take about 2 to 2½ hours start to finish. Then the pie needs to cool before you can eat it, so that’s maybe another hour.

Abby Fisher’s Sweet Potato Pie
(makes one pie)
dough for flaky pie crust (recipe follows)
1 lb sweet potatoes, baked until tender (about 45 minutes at 400℉)
½ Tbl butter
3 eggs, separated
¼ cup milk
½ cup sugar (or more if you prefer it sweeter)
juice of half an orange (about 2 to 3 Tbl)
zest of ¼ of an orange, about 1 tsp*
½ tsp Diamond Crystal kosher salt, or ¼ tsp table salt

*You could use regular orange juice and not bother squeezing the orange, but I strongly recommend using the zest because there’s so much flavor in it.

Flaky Pie Crust
5½ oz (1¼ cups) all-purpose flour
¾ tsp Diamond Crystal kosher salt (or 3/8 tsp table salt)
1 oz (2 Tbl) vegetable shortening
2 oz (½ stick) butter
2 to 3 oz (¼ cup or more) ice water

To make the pie dough:
In a medium bowl, whisk together the flour and salt.
Cut in the shortening and butter using a pastry blender, knives, or your fingers.
Add the ice water a little at a time, fluffing with a fork or your fingers.
When the dough holds together, pat it into a disk, wrap it in plastic, and refrigerate it for 30 minutes or longer.
When the dough is chilled, roll it into a circle, fit it into a pie plate (I use a 9″ Pyrex plate), and crimp the edges.

To make the filling:
Peel the hot potatoes, put them in a bowl, and mash them with a masher or fork.

Peeling the sweet potato: You can just pull the skin right off.

Peeling the sweet potato: You can just pull the skin right off.


Mash in the butter and stir in the salt.
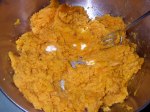
Mash the potatoes, then mash in the butter.

Mash the potatoes, then mash in the butter.


In another bowl, beat the yolks until they’re thick and light, about 1 minute. Whisk in the milk, sugar, juice, and zest.
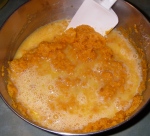
Stir the egg mixture into the potatoes.

Stir the egg mixture into the potatoes.


Whisk the whites until they’re foamy. (You’re not making meringue, but you’re using them to lighten the filling, so be aggressive.) Stir the whites gently into the potatoes.
Gently stir in the beaten whites.

Gently stir in the beaten whites.

To assemble and bake the pie:
Turn the filling into the pie shell.
Bake at 400℉ for 40 to 50 minutes.

Sweet potato pie right out of the oven

Sweet potato pie right out of the oven

References
Fisher, Abby: What Mrs. Fisher Knows About Old Southern Cooking, Soups, Pickles, Preserves, Etc. San Francisco: Women’s Co-operative Printing Office, 1881.
Fisher, Abby: What Mrs. Fisher Knows About Old Southern Cooking, Soups, Pickles, Preserves, Etc. Facsimile edition, with historical notes by Karen Hess. Bedford, Mass: Applewood Books, 1995.

Leave a comment

Filed under pie

Mustard

Making mustard isn’t baking, but I’ve just learned how to do it, and it can be used on baked goods, like bread or pork pie. Now I just have to learn to make pork pie.

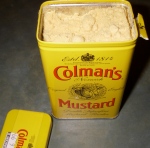
There are two basic recipes. One uses mustard seeds and mustard powder, and the other just uses mustard powder. The common mustard powder is Colman’s, which is an English product that’s available in many grocery stores in North America.

Colman's mustard powder in the 4-oz tin

Colman's mustard powder in the 4-oz tin

You can put together a small batch of mustard and store it in the refrigerator for a few weeks. If you want it to keep longer than that, or if you want to be able to give it as a handmade gift, you have to can it, which involves having canning jars with proper lids, sterilizing the jars and lids, and heating the mustard to 135℉ before you put it in the sterilized jars. I might actually do this for holiday gifts; we’ll see.

I got my tin of Colman’s at the Harvest Co-op in Central Square, Cambridge, and my mustard seeds (some yellow and some brown) from the bulk jars there. The Colman’s was $7 for 4 ounces, and the mustard seeds were $5.39 a pound or $6.49 a pound, depending on the variety, and I got about half a pound of each, which brings my investment in mustard-only ingredients to about $13. This will make plenty of mustard, but obviously you don’t make your own mustard unless you really love mustard and want to be creative with it.

Mustard seeds and mustard powder

Mustard seeds and mustard powder

I’m pretty much following the recipe from Maggie Oster’s Herbal Vinegar. Here’s her list of ingredients for 2 cups of mustard:

½ cup light or dark mustard seeds
¼ cup dry English mustard
¾ cup herb or other flavored vinegar
⅔ cup water, wine, beer, or fruit juice
¼ cup fresh herbs, minced; or 2 Tablespoons herb seeds, ground
2 Tablespoons honey or 3 Tablespoons white or packed brown sugar
1 teaspoon salt

Here’s my list of ingredients, which, except for the mustard ingredients, I already had in my pantry:

1½ oz (¼ cup) yellow mustard seeds
1½ oz (scant ¼ cup) brown mustard seeds (these are smaller than the yellow ones, so they pack tighter)
¾ oz (¼ cup) Colman’s mustard powder
6 oz (¾ cup) white wine vinegar
4¾ oz (⅔ cup) Noilly Prat dry vermouth
2 tsp dried tarragon (the one that keeps coming up in mustard recipes)
1 oz (2 Tbl) clover honey
2 tsp Diamond Crystal kosher salt

Mustard ingredients

Mustard ingredients

Combine the mustard seeds, mustard powder, vinegar, and vermouth in a measuring pitcher or other nonreactive container.

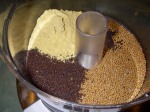
Counterclockwise from top left: mustard powder, brown mustard seeds, yellow mustard seeds

Counterclockwise from top left: mustard powder, brown mustard seeds, yellow mustard seeds

Let the mixture sit for 4 hours, uncovered, stirring occasionally. You can let it sit as little as 2 hours or as long as overnight, if that’s more convenient.

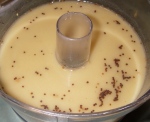
Mustards, vinegar, and vermouth

Mustards, vinegar, and vermouth

Maggie wants you to add the remaining ingredients and process the mixture until it’s the consistency you like. Unfortunately, the seeds just whir around in the liquid and don’t get ground at all. You need to strain off the liquid first. Just pouring off the liquid wasn’t enough:

Most of the liquid poured off

Most of the liquid poured off


I had to pour the mixture through a strainer and then return the seed glop to the workbowl. It took awhile to get the seeds ground into anything resembling paste, but that’s because my food processor’s blade is dull. If you have a good sharp blade, this should take a minute or two. If you want to get a good look at the progress, stop the machine and take off the lid. I made the mistake of lifting the pusher out of the feed tube and looking in through there, and the fumes nearly blinded me.
Mustard seeds ground to a grainy paste

Mustard seeds ground to a grainy paste


When the consistency looks like what you want, add the herbs and salt:
Tarragon and salt added to the mustard paste

Tarragon and salt added to the mustard paste


I stirred the honey into the liquid ingredients and poured that into the workbowl and let ‘er rip. After a few more minutes (less if your blade is sharp), I thought I had mustard.
Decanting the mustard into a glass container

Decanting the mustard into a glass container


This is a little runny. For stiffer mustard, you can use sugar instead of honey, and you can grind the seeds more.

Taste the mustard to see how hot it is; it will be hot. If you like it that hot, put it in a container and store it in the fridge. If you’d like it to mellow a bit, leave the container at room temperature. When the mustard mellows to your preferred level of heat, store it in the fridge. According to a helpful FAQ, once the mustard is chilled, the level of heat is set. Dr. Science is skeptical. I have some mustard that I made in a class and stored in the fridge as soon as I got it home. He proposes to experiment by keeping some in the fridge and some on the counter and tasting them both (at room temperature) at intervals to see if the one on the counter retains its heat or mellows.

This is obviously grainy mustard. If you want smooth mustard, Maggie’s ingredients are:

1 cup dry English mustard
1 cup herb or other flavored vinegar
3 Tbl water, wine, beer, or fruit juice
1/4 cup fresh herbs, minced
2 Tbl honey or 3 Tbl white or packed brown sugar
1 tsp salt

You’ll need a bigger tin of mustard powder, or you’ll have to make a smaller batch. The procedure is the same, except you skip the part about grinding the seeds, obviously.

Reference
Maggie Oster: Herbal Vinegar. Pownal, Vermont: Storey Publishing, 1994, p 113.

Leave a comment

Filed under Uncategorized

Dulce de Leche

You can buy dulce de leche in any gourmet shop for $9 or $10 for 16 oz (a little over a cup in volume), or you can buy a can of sweetened condensed milk for $3 or less and make your own. There are fiddly, time-consuming ways to make your own, or you can just pop the can in your slow cooker or pressure cooker, which is my idea of convenience.

If you do it in the slow cooker, you put the can in the crock, add water to not quite the top of the can, put the lid on the cooker, set it on low, and leave it for 8 hours. I imagine you could do several cans at once this way, and I think I’m going to try that. What I like about the slow cooker is you can leave the house while it’s on. I would never leave the house with the oven or stove on. You could set this up at bedtime and take the cans out in the morning. The procedure is a little time sensitive, so if you’re not on a strict 8-hour sleep schedule, you could overcook the milk and end up with stiffer caramel than you want.

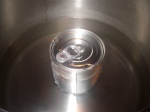
What I did today was put the one can in the pressure cooker, add 2 quarts of water, bring it up to pressure, and let it cook for 45 minutes. People are afraid of pressure cookers, but they’re safer now than they used to be, and if you pay attention and follow directions, they’re brilliant. Some people use them all the time. Indians use pressure cookers daily to cook things like beans without spending hours at it, and nothing bad happens.

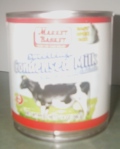
To make your own dulce de leche in the pressure cooker, start with a can of sweetened condensed milk.

A 14-oz can of sweetened condensed milk

A 14-oz can of sweetened condensed milk

Remove the label, put the can in the pressure cooker, and add 2 quarts of water.

The naked can in the pressure cooker with 2 quarts of water

The naked can in the pressure cooker with 2 quarts of water

Check the pressure cooker’s lid to make sure the gasket is installed correctly, and look through the steam vent to make sure you can see through the hole. Lock the lid on the pan. The lid lock itself will stay down until the pressure builds up. Once the pressure has built up in the pan, the lock button rises to lock the lid on.

When the time is up, remove the pan from the burner and let the whole thing cool. For many applications (e.g., cooking beans), you can run cold water over the pan until the lid lock drops and then remove the lid, but you shouldn’t do that with a can in there because the can will still be very hot and could burst open. You can run cold water over the closed pan, and when the pan has cooled enough that it’s only warm to the touch, you can safely remove the lid from the pan. At this point, the can will be warm but not too hot to handle, and you can open it and see what you have.

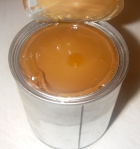
Like magic, it's dulce de leche.

Like magic, it's dulce de leche.

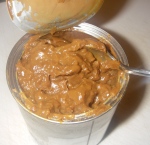
Of course, the milk continues to cook in the can while you’re waiting for it to cool, and I think 40 minutes would be better, because this is pretty stiff.

Very stiff dulce de leche

Very stiff dulce de leche


It’s delicious, though. I’ll be using some of it in an apple tart in the next day or two. This might be a good consistency for filling cookies or macarons.

Leave a comment

Filed under dulce de leche

Peter Reinhart’s Many-Seed Bread

I spotted Peter Reinhart’s Artisan Breads Every Day at the library this afternoon, so I grabbed it. I gave it to Dr. Science so he could pick out something, and he picked out Many-Seed Bread. I like bread with seeds, too, and I had all the ingredients, so I made it.

All the ingredients

All the ingredients

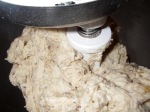
This one has more than a pound and a half of flour and 5 ounces of seeds, so it’s just on the verge of being too much dough for my 4½ quart stand mixer.

That's an awful lot of dough for this mixer.

That's an awful lot of dough for this mixer.

Once again, I’m fantasizing about winning the lottery and buying a 7-quart Viking. The dough went together just as Peter said it should.

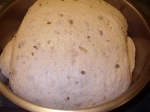
I diverged from the directions when he said to put the dough in the fridge overnight, because we’re out of bread now. So I left it to rise in a warm spot for 45 minutes, at which point I punched it down, gave it a stretch and fold, and left it to rise again. After another 45 minutes, I punched the dough down, gave it another stretch and fold, and let it rise for another 45 minutes. The yeast were obviously feeding happily.

The yeast are doing their job.

The yeast are doing their job.

Then I divided the dough into two loaves, gave them a little bench rest, and let them rise in loaf pans. After almost an hour, they had crested the pans and looked good, so I gave them an egg wash (a beaten egg brushed on the loaf glues the seeds on), sprinkled them with sesame seeds and flax seeds, and popped them in the oven at 350℉ for 45 minutes.

I got no oven spring, and I don’t know why. It might be the pans. I had another loaf in the oven at the same time (cinnamon-raisin bread, which had huge oven spring), but I don’t know if that had anything to do with it.

The bread is good, though. No doubt the long rise in the fridge would develop wonderful flavor, but this is definitely good bread.

Many-Seed Bread
(adapted from Artisan Breads Every Day)
22½ oz bread flour
3 oz whole rye flour
2 oz sesame seeds
1 oz sunflower seeds
1 oz pumpkin seeds
1 oz flax seeds
3½ tsp Diamond Crystal kosher salt
1½ T instant yeast
2 oz agave nectar
12 oz warm water
6 oz whole-milk plain yogurt

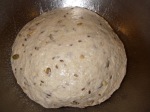
Put all the ingredients in your stand mixer, fit the mixer with the paddle, and mix on low speed for 2 minutes. Let the dough rest for 5 minutes while you clean the paddle and tidy away the ingredients. Fit the mixer with the dough hook and mix on medium low speed for 3 to 4 minutes. Turn the dough onto a floured counter and knead by hand for about 3 minutes. Spray a large bowl with cooking spray. Round the dough, pop it in the bowl, spray the dough with a little oil, and cover the bowl with plastic wrap and a towel.

The dough ready to begin its first rise

The dough ready to begin its first rise

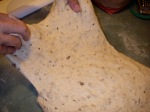
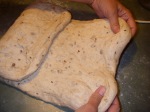
Let the dough rise in a warm place for 45 minutes, then turn it out onto the counter, punch it down, and give it a stretch and fold: Stretch the dough to one side.

Stretch the dough

Stretch the dough

Fold that over the center.

Fold the dough over the center.

Fold the dough over the center.

Stretch the dough out on the other side.

Stretch out the other side of the dough.

Stretch out the other side of the dough.

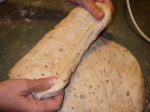
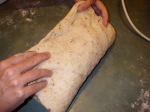
Fold that over the previous fold, just like folding a letter into thirds.

Fold the second side down, like folding a letter.

Fold the second side down, like folding a letter.

Now do that again in the other direction. Put the dough back in the bowl, cover it as before, and let it rise for another 45 minutes. Give it another stretch and fold. Give it another 45-minute rise.

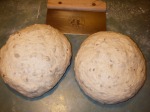
Punch the dough down and divide it into two (each should weigh about 1 lb 10½ oz, if you have a scale).

Dough divided and resting

Dough divided and resting

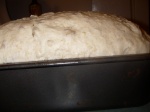
Cover those with plastic and let them rest for 15 minutes. Spray two 9″ x 5″ loaf pans with cooking spray. Gently form the dough into loaves and place them in the pans. Cover the pans with plastic and towels and let them rise until they crest the top of the loaf pans by about 1 inch.

Dough cresting above the edge of the pan

Dough cresting above the edge of the pan

If you want to decorate them with seeds, beat an egg in a dish and brush some beaten egg on the top of each loaf.

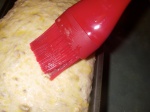
Brushing egg wash onto the dough

Brushing egg wash onto the dough

Sprinkle on some seeds. Peter suggests sesame seeds and poppy seeds; I used sesame and flax.

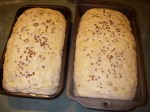
Egg-washed loaves sprinkled with sesame and flax seeds

Egg-washed loaves sprinkled with sesame and flax seeds

The egg acts as a glue to keep the seeds stuck on the bread. Egg white (or egg white mixed with water) also makes the crust shiny and a little crisper; whole egg makes the crust shiny and a little softer because the fat in the yolk slows down the evaporation of moisture somewhat.

Bake the loaves at 350℉ for 45 minutes, switching their places and rotating the pans 180 degrees about 20 minutes into the baking. The bread is done when the internal temperature is between 190℉ and 210℉. Remove the loaves from the pans and let them cool on a rack for an hour (or longer) before slicing.

A finished loaf

A finished loaf

And, of course, the crumb view:

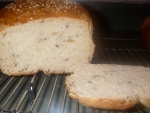
Many-seed bread: the crumb view

Many-seed bread: the crumb view

Reference
Peter Reinhart: Many-Seed Bread. In Artisan Breads Every Day. New York: Ten Speed Press, 2009, pp 102-103.

Leave a comment

Filed under bread

Chocolate Pear Tart

I like Clotilde Dusoulier’s blog, Chocolate & Zucchini. I discovered it when I was looking for an oil-based tart crust. Clotilde has a couple of books, too, and I’ve been reading Clotilde’s Edible Adventures in Paris; if I ever get to Paris again, this will be a valuable reference. In the meantime, though, it includes a killer recipe for a chocolate pear tart, and the recipe is not on her blog, so far as I can tell.

A slice of chocolate pear tart

A slice of chocolate pear tart


Clotilde’s recipe calls for a pâte brisée, but I used a pâte sablée because I had the dough in the freezer, and I used a smaller tart pan because the dough would only stretch that far. So to make Clotilde’s tart the way she did, use a 28- to 30-cm (11 to 12 inches) tart shell and cut the pears into 6 pieces (for a total of 12 pieces). This will give you 12 servings (unless my nephew Ed is sharing it). I used a 23-cm (9 inches) tart pan and cut the pears into 4 pieces (for a total of 8).

Clotilde’s Chocolate Pear Tart
(adapted from Tarte-Gâteau Poire Chocolat)
One recipe of pâte brisée or other tart dough of your choice

For the chocolate filling:
3 T (¾ oz) all-purpose flour
¼ tsp baking powder
pinch of fine sea salt
7 T (3½ oz) butter, cut into small pieces
4½ oz dark chocolate, broken into small pieces (I used Green & Black 72% bittersweet)
½ cup (2 oz) granulated sugar
1 egg plus 1 egg white (Clotilde used a yolk in her crust; I suspect you could use 2 eggs if you wanted)

For the poached pears:
2 Anjou, Bartlett, Bosc, or other pears that will hold their shape after poaching (about 1 lb)
2 T granulated white sugar
3 T dark rum (I used Myers’s)
1 cup water

Blind bake the tart shell; I baked mine at 375℉ for 20 minutes, removed the weights, and gave it another 5 minutes. While that’s going on, poach the pears and make the chocolate filling.

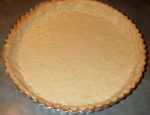
Blind-baked pâte sablée tart shell

Blind-baked pâte sablée tart shell


To poach the pears, peel the pears, cut out the stem and blossom, and scoop out the core. Cut the pears into 4 or 6 pieces each. Combine the water, sugar, and rum in a small to medium saucepan and bring the syrup to a simmer. Immerse the pears in the syrup and poach them for 5 minutes or so, until they’re tender but still firm. Drain the pears in a colander.

To make the chocolate filling, melt the chocolate and butter. I mixed the pieces in a microwave-safe bowl and heated them on medium for 30 seconds at a time, stirring with a rubber spatula between times, and it all melted safely after a total of 2 minutes. You can also melt them on the stove over simmering water. Whisk together the dry ingredients in a small bowl and set aside. Whisk the eggs and sugar in a medium bowl, stir in the melted butter and chocolate, then stir in the flour mixture.

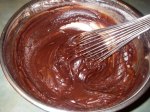
Chocolate custard filling

Chocolate custard filling


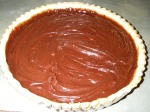
To assemble the tart, turn the chocolate mixture into the tart shell, and smooth it as well as you can.
Shell filled with chocolate filling

Shell filled with chocolate filling


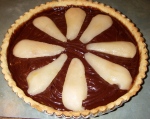
Arrange the pears over the filling.
Assembled tart, ready to bake

Assembled tart, ready to bake


Bake the tart at 350℉ for 20 minutes.
After 10 minutes of baking, the filling is beginning to puff.

After 10 minutes of baking, the filling is beginning to puff.


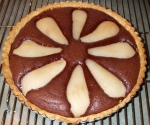
The custard should be a little jiggly in the middle; it will continue cooking after your remove it from the oven.
Done (I think) and cooling

Done (I think) and cooling


When it’s cool enough to handle, remove it from the tart pan and put it on a serving dish. The 23-cm size yields eight servings (or two, if Ed is around). It almost yielded four servings, because Dr. Science thought he’d like a large slice. I asked him to take an eighth and come back for seconds, so I could get a photo. About halfway through that slice, he decided he’d come back for seconds in a few hours. It’s very rich.

This tart pan is a little deeper than my 30-cm one, and the filling was still somewhat creamy, so possibly I should’ve given it a few more minutes, or possibly it needed to cool a little longer. Of course, possibly this is how it’s supposed to be. Clotilde describes the filling as fudgy and cake-y. I figured it would be like the filling in those plum (or pluot) tarts I was making this summer, but those weren’t really creamy when they were baked. I do like this texture, though. And boy, is this tart delicious.

Reference
Clotilde Dusoulier, Tarte-Gâteau Poire Chocolat, in Clotilde’s Edible Adventures in Paris. New York: Broadway Books, 2008, p. 192.

Leave a comment

Filed under chocolate, fruit, tart