Monthly Archives: October 2010

Dulce de Leche

You can buy dulce de leche in any gourmet shop for $9 or $10 for 16 oz (a little over a cup in volume), or you can buy a can of sweetened condensed milk for $3 or less and make your own. There are fiddly, time-consuming ways to make your own, or you can just pop the can in your slow cooker or pressure cooker, which is my idea of convenience.

If you do it in the slow cooker, you put the can in the crock, add water to not quite the top of the can, put the lid on the cooker, set it on low, and leave it for 8 hours. I imagine you could do several cans at once this way, and I think I’m going to try that. What I like about the slow cooker is you can leave the house while it’s on. I would never leave the house with the oven or stove on. You could set this up at bedtime and take the cans out in the morning. The procedure is a little time sensitive, so if you’re not on a strict 8-hour sleep schedule, you could overcook the milk and end up with stiffer caramel than you want.

What I did today was put the one can in the pressure cooker, add 2 quarts of water, bring it up to pressure, and let it cook for 45 minutes. People are afraid of pressure cookers, but they’re safer now than they used to be, and if you pay attention and follow directions, they’re brilliant. Some people use them all the time. Indians use pressure cookers daily to cook things like beans without spending hours at it, and nothing bad happens.

To make your own dulce de leche in the pressure cooker, start with a can of sweetened condensed milk.

A 14-oz can of sweetened condensed milk

A 14-oz can of sweetened condensed milk

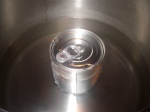
Remove the label, put the can in the pressure cooker, and add 2 quarts of water.

The naked can in the pressure cooker with 2 quarts of water

The naked can in the pressure cooker with 2 quarts of water

Check the pressure cooker’s lid to make sure the gasket is installed correctly, and look through the steam vent to make sure you can see through the hole. Lock the lid on the pan. The lid lock itself will stay down until the pressure builds up. Once the pressure has built up in the pan, the lock button rises to lock the lid on.

When the time is up, remove the pan from the burner and let the whole thing cool. For many applications (e.g., cooking beans), you can run cold water over the pan until the lid lock drops and then remove the lid, but you shouldn’t do that with a can in there because the can will still be very hot and could burst open. You can run cold water over the closed pan, and when the pan has cooled enough that it’s only warm to the touch, you can safely remove the lid from the pan. At this point, the can will be warm but not too hot to handle, and you can open it and see what you have.

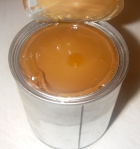
Like magic, it's dulce de leche.

Like magic, it's dulce de leche.

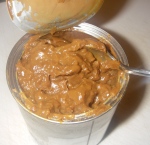
Of course, the milk continues to cook in the can while you’re waiting for it to cool, and I think 40 minutes would be better, because this is pretty stiff.

Very stiff dulce de leche

Very stiff dulce de leche


It’s delicious, though. I’ll be using some of it in an apple tart in the next day or two. This might be a good consistency for filling cookies or macarons.


Leave a comment

Filed under dulce de leche

Peter Reinhart’s Many-Seed Bread

I spotted Peter Reinhart’s Artisan Breads Every Day at the library this afternoon, so I grabbed it. I gave it to Dr. Science so he could pick out something, and he picked out Many-Seed Bread. I like bread with seeds, too, and I had all the ingredients, so I made it.

All the ingredients

All the ingredients

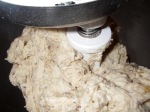
This one has more than a pound and a half of flour and 5 ounces of seeds, so it’s just on the verge of being too much dough for my 4½ quart stand mixer.

That's an awful lot of dough for this mixer.

That's an awful lot of dough for this mixer.

Once again, I’m fantasizing about winning the lottery and buying a 7-quart Viking. The dough went together just as Peter said it should.

I diverged from the directions when he said to put the dough in the fridge overnight, because we’re out of bread now. So I left it to rise in a warm spot for 45 minutes, at which point I punched it down, gave it a stretch and fold, and left it to rise again. After another 45 minutes, I punched the dough down, gave it another stretch and fold, and let it rise for another 45 minutes. The yeast were obviously feeding happily.

The yeast are doing their job.

The yeast are doing their job.

Then I divided the dough into two loaves, gave them a little bench rest, and let them rise in loaf pans. After almost an hour, they had crested the pans and looked good, so I gave them an egg wash (a beaten egg brushed on the loaf glues the seeds on), sprinkled them with sesame seeds and flax seeds, and popped them in the oven at 350℉ for 45 minutes.

I got no oven spring, and I don’t know why. It might be the pans. I had another loaf in the oven at the same time (cinnamon-raisin bread, which had huge oven spring), but I don’t know if that had anything to do with it.

The bread is good, though. No doubt the long rise in the fridge would develop wonderful flavor, but this is definitely good bread.

Many-Seed Bread
(adapted from Artisan Breads Every Day)
22½ oz bread flour
3 oz whole rye flour
2 oz sesame seeds
1 oz sunflower seeds
1 oz pumpkin seeds
1 oz flax seeds
3½ tsp Diamond Crystal kosher salt
1½ T instant yeast
2 oz agave nectar
12 oz warm water
6 oz whole-milk plain yogurt

Put all the ingredients in your stand mixer, fit the mixer with the paddle, and mix on low speed for 2 minutes. Let the dough rest for 5 minutes while you clean the paddle and tidy away the ingredients. Fit the mixer with the dough hook and mix on medium low speed for 3 to 4 minutes. Turn the dough onto a floured counter and knead by hand for about 3 minutes. Spray a large bowl with cooking spray. Round the dough, pop it in the bowl, spray the dough with a little oil, and cover the bowl with plastic wrap and a towel.

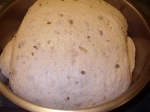
The dough ready to begin its first rise

The dough ready to begin its first rise

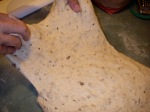
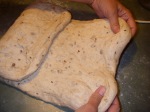
Let the dough rise in a warm place for 45 minutes, then turn it out onto the counter, punch it down, and give it a stretch and fold: Stretch the dough to one side.

Stretch the dough

Stretch the dough

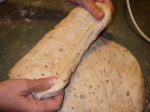
Fold that over the center.

Fold the dough over the center.

Fold the dough over the center.

Stretch the dough out on the other side.

Stretch out the other side of the dough.

Stretch out the other side of the dough.

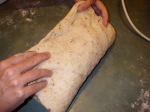
Fold that over the previous fold, just like folding a letter into thirds.

Fold the second side down, like folding a letter.

Fold the second side down, like folding a letter.

Now do that again in the other direction. Put the dough back in the bowl, cover it as before, and let it rise for another 45 minutes. Give it another stretch and fold. Give it another 45-minute rise.

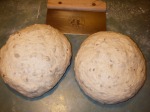
Punch the dough down and divide it into two (each should weigh about 1 lb 10½ oz, if you have a scale).

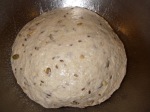
Dough divided and resting

Dough divided and resting

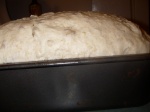
Cover those with plastic and let them rest for 15 minutes. Spray two 9″ x 5″ loaf pans with cooking spray. Gently form the dough into loaves and place them in the pans. Cover the pans with plastic and towels and let them rise until they crest the top of the loaf pans by about 1 inch.

Dough cresting above the edge of the pan

Dough cresting above the edge of the pan

If you want to decorate them with seeds, beat an egg in a dish and brush some beaten egg on the top of each loaf.

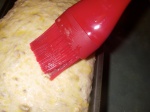
Brushing egg wash onto the dough

Brushing egg wash onto the dough

Sprinkle on some seeds. Peter suggests sesame seeds and poppy seeds; I used sesame and flax.

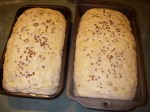
Egg-washed loaves sprinkled with sesame and flax seeds

Egg-washed loaves sprinkled with sesame and flax seeds

The egg acts as a glue to keep the seeds stuck on the bread. Egg white (or egg white mixed with water) also makes the crust shiny and a little crisper; whole egg makes the crust shiny and a little softer because the fat in the yolk slows down the evaporation of moisture somewhat.

Bake the loaves at 350℉ for 45 minutes, switching their places and rotating the pans 180 degrees about 20 minutes into the baking. The bread is done when the internal temperature is between 190℉ and 210℉. Remove the loaves from the pans and let them cool on a rack for an hour (or longer) before slicing.

A finished loaf

A finished loaf

And, of course, the crumb view:

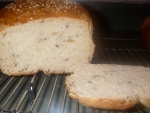
Many-seed bread: the crumb view

Many-seed bread: the crumb view

Reference
Peter Reinhart: Many-Seed Bread. In Artisan Breads Every Day. New York: Ten Speed Press, 2009, pp 102-103.

Leave a comment

Filed under bread

Chocolate Pear Tart

I like Clotilde Dusoulier’s blog, Chocolate & Zucchini. I discovered it when I was looking for an oil-based tart crust. Clotilde has a couple of books, too, and I’ve been reading Clotilde’s Edible Adventures in Paris; if I ever get to Paris again, this will be a valuable reference. In the meantime, though, it includes a killer recipe for a chocolate pear tart, and the recipe is not on her blog, so far as I can tell.

A slice of chocolate pear tart

A slice of chocolate pear tart


Clotilde’s recipe calls for a pâte brisée, but I used a pâte sablée because I had the dough in the freezer, and I used a smaller tart pan because the dough would only stretch that far. So to make Clotilde’s tart the way she did, use a 28- to 30-cm (11 to 12 inches) tart shell and cut the pears into 6 pieces (for a total of 12 pieces). This will give you 12 servings (unless my nephew Ed is sharing it). I used a 23-cm (9 inches) tart pan and cut the pears into 4 pieces (for a total of 8).

Clotilde’s Chocolate Pear Tart
(adapted from Tarte-Gâteau Poire Chocolat)
One recipe of pâte brisée or other tart dough of your choice

For the chocolate filling:
3 T (¾ oz) all-purpose flour
¼ tsp baking powder
pinch of fine sea salt
7 T (3½ oz) butter, cut into small pieces
4½ oz dark chocolate, broken into small pieces (I used Green & Black 72% bittersweet)
½ cup (2 oz) granulated sugar
1 egg plus 1 egg white (Clotilde used a yolk in her crust; I suspect you could use 2 eggs if you wanted)

For the poached pears:
2 Anjou, Bartlett, Bosc, or other pears that will hold their shape after poaching (about 1 lb)
2 T granulated white sugar
3 T dark rum (I used Myers’s)
1 cup water

Blind bake the tart shell; I baked mine at 375℉ for 20 minutes, removed the weights, and gave it another 5 minutes. While that’s going on, poach the pears and make the chocolate filling.

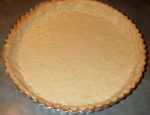
Blind-baked pâte sablée tart shell

Blind-baked pâte sablée tart shell


To poach the pears, peel the pears, cut out the stem and blossom, and scoop out the core. Cut the pears into 4 or 6 pieces each. Combine the water, sugar, and rum in a small to medium saucepan and bring the syrup to a simmer. Immerse the pears in the syrup and poach them for 5 minutes or so, until they’re tender but still firm. Drain the pears in a colander.

To make the chocolate filling, melt the chocolate and butter. I mixed the pieces in a microwave-safe bowl and heated them on medium for 30 seconds at a time, stirring with a rubber spatula between times, and it all melted safely after a total of 2 minutes. You can also melt them on the stove over simmering water. Whisk together the dry ingredients in a small bowl and set aside. Whisk the eggs and sugar in a medium bowl, stir in the melted butter and chocolate, then stir in the flour mixture.

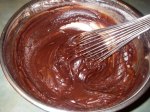
Chocolate custard filling

Chocolate custard filling


To assemble the tart, turn the chocolate mixture into the tart shell, and smooth it as well as you can.
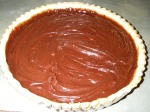
Shell filled with chocolate filling

Shell filled with chocolate filling


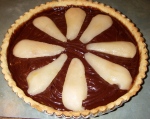
Arrange the pears over the filling.
Assembled tart, ready to bake

Assembled tart, ready to bake


Bake the tart at 350℉ for 20 minutes.
After 10 minutes of baking, the filling is beginning to puff.

After 10 minutes of baking, the filling is beginning to puff.


The custard should be a little jiggly in the middle; it will continue cooking after your remove it from the oven.
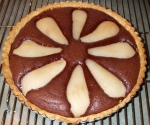
Done (I think) and cooling

Done (I think) and cooling


When it’s cool enough to handle, remove it from the tart pan and put it on a serving dish. The 23-cm size yields eight servings (or two, if Ed is around). It almost yielded four servings, because Dr. Science thought he’d like a large slice. I asked him to take an eighth and come back for seconds, so I could get a photo. About halfway through that slice, he decided he’d come back for seconds in a few hours. It’s very rich.

This tart pan is a little deeper than my 30-cm one, and the filling was still somewhat creamy, so possibly I should’ve given it a few more minutes, or possibly it needed to cool a little longer. Of course, possibly this is how it’s supposed to be. Clotilde describes the filling as fudgy and cake-y. I figured it would be like the filling in those plum (or pluot) tarts I was making this summer, but those weren’t really creamy when they were baked. I do like this texture, though. And boy, is this tart delicious.

Reference
Clotilde Dusoulier, Tarte-Gâteau Poire Chocolat, in Clotilde’s Edible Adventures in Paris. New York: Broadway Books, 2008, p. 192.

Leave a comment

Filed under chocolate, fruit, tart

Apple Pie and Wegman’s

Most of my baking has been at school these days, but we needed dessert on Monday, and we have plenty of apples, so apple pie was the answer. Just for fun, I tried to spiff it up a bit.

I used the usual flaky pie crust recipe and the usual sugar mixture for the filling. I should’ve cut back on the sugar mixture, because I used fewer apples; well, I’ll know better next time. Usually I use three each of Granny Smith and Empire, but this time I used two Granny Smith, two Empire, and one Golden Delicious. Partly I wanted to try something a little different, and partly I was trying to reduce the amount of filling; you’d think that would’ve been a clue to reduce the amount of sugar mixture.

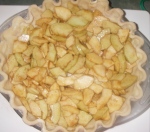
Apple pie awaiting a decorative top crust

Apple pie awaiting a decorative top crust


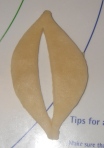
Anyway, instead of the usual full top crust with slits cut in it, I wanted to try something festive with leaf shapes. I don’t have leaf cookie cutters, but they would be convenient. Instead, I just rolled out some dough and cut shapes with a knife.
Apple-leaf shape cut from flaky pie dough

Apple-leaf shape cut from flaky pie dough


Then I cut down the middle all the way through to represent the main vein:
Main leaf vein cut all the way through

Main leaf vein cut all the way through


and then added some nicks on either side to represent the secondary veins.
Finished leaf

Finished leaf


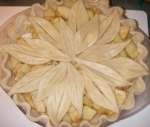
I made 16 of these because a pie is normally eight servings. (When our nephew Ed is eating it, the number of servings is significantly fewer.) Then I arranged them radiating out from the center, which seemed logical.
Leaf cutouts forming a top crust

Leaf cutouts forming a top crust


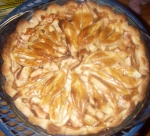
Unfortunately, that layout looks a lot like a poinsettia. Sometimes a centered, symmetrical design is not the best one. I’ll try this again and arrange the leaves differently, maybe in a kind of spiral or maybe randomly. Then I brushed the leaves with egg wash, which was just a beaten egg. Egg white would’ve worked, too. The white adds shine, and the yolk browns and makes the leaves a slightly different color from the rest of the crust.
The finished pie

The finished pie

In other news, Wegman’s is coming to Massachusetts! I’m pretty sure I had nothing to do with this, and the first store is 20 miles from the Hub of the Universe, but they’re planning several more to open over the next 5 to 7 years, and it’s looking like Cambridge will be a good fit.

Leave a comment

Filed under pie