Monthly Archives: June 2010

Tomato Tart Again

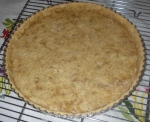
My dad and stepmother are here visiting, and that’s a good reason to try the tomato tart again. This time I used Clotilde’s olive oil crust from Chocolate and Zucchini. I blind baked that for 20 minutes at 375℉, and then after it cooled, I decided I’d like to bake the tart out of the tart pan. So then I put the tart shell on a pizza pan (instead of a baking sheet), which seemed like a good idea at the time. Later I realized that the holes in the pizza pan help make the crust crisp, and it sure made this crust crisp! Next time, I’ll using a baking sheet. The tart was very hard to slice because the crust was crunchy.

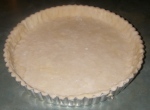
Olive oil tart shell with dried oregano

Olive oil tart shell with dried oregano


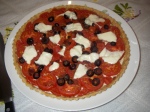
I didn’t get back to Trader Joe’s for those heirloom cherry tomatoes, which I liked a lot. Instead I got some regular red tomatoes, which worked fine but weren’t quite so pretty. Just for fun, I tossed on some sliced black olives.
Tomato tart with red tomatoes

Tomato tart with red tomatoes


The tart was a big hit, and I think before they leave I’ll make a point of getting some of those heirloom cherry tomatoes and making another one.

Leave a comment

Filed under tart

All’s Well that Ends Well

Today, everything that could go wrong did go wrong.

One of my baking projects today was sourdough bread. That was going well enough until I tried to get the dough into the oven. I had formed a round loaf and decorated it with parsley. Then, thinking I was doing what I was supposed to, I floured a tea towel, lined a bowl with that, and turned the decorated dough into the bowl to rise upside down.

Apparently I failed to flour the towel well enough because when I tried to remove the towel, it stuck. I carefully peeled the towel off the dough, only destroying the loaf somewhat, and managed to get the loaf onto the baking sheet. As I slid the baking sheet into the oven, the dough slid off and fell onto the oven door.

At that point I gave up. I turned off the oven and scraped the dough off the oven door. But my hands couldn’t help forming the dough into a ball. So I tossed the ball of dough onto the baking sheet, slashed the dough across the top, and shoved it into the oven.

Half an hour later, I checked the bread. It didn’t look right. I took its temperature and got 126℉. That’s when I noticed the oven was off. I told Dr. Science, “Okay, that’s it. I’m throwing this away and trying again tomorrow.” Dr. Science said, “Why not just turn on the oven and see what happens?” I said, “You can turn on the oven and see what happens if you want.”

Dr. Science took the bread out of the oven when the bread’s internal temperature reached 200℉, and here it is:

Disaster sourdough bread

Disaster sourdough bread

2 Comments

Filed under bread, sourdough

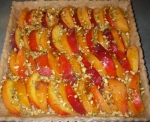
Peach and Apricot Tart

Peaches and apricots are two of my favorite fruits, and they’re coming into season now, so I’m taking the opportunity to make this peach and apricot tart, which I’ve had bookmarked for a long time.

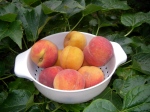
Fresh peaches and apricots

Fresh peaches and apricots

My mom didn’t cook or bake for fun, and when I was a kid, we didn’t have a pantry. If you wanted to make something, you had to look at the list of ingredients and then go buy what you needed, which, typically, was everything. One of the neighbors had a walk-in pantry that had everything you could want, and I thought that was the coolest thing. I wanted a pantry like that when I grew up, and I have one! I mention this because some of the ingredients for this tart are a little exotic, but I actually have everything right here. Well, I did have to buy the fruit, but fresh fruit isn’t something you store in your pantry.

Almond Oil Tart Crust
150 g all purpose flour
50 g quinoa flour
30 g pulverized almonds
60 g granulated sugar
a few grinds of sea salt
80 mL (75 g) almond oil
80 mL ice water

Whisk together the dry ingredients. Stir in the almond oil.

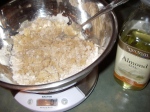
Dry ingredients with almond oil added

Dry ingredients with almond oil added

Pour in the ice water, stirring, until the dough forms lumps; you might not need all the ice water. (You can also do this in a food processor, but today I just wanted to put the bowl on the scale and weigh everything.) Allow the dough to sit at room temperature for an hour.

Preheat the oven to 350℉.

Spread the dough in a 24-cm tart pan and dock the dough. (I used the 9-inch square tart pan, which isn’t quite the same size, but it worked fine.) Put the tart shell in the freezer while you prepare the filling.

Filling
2 large peaches and 2 or 3 apricots
4 T pulverized almonds
2 T chopped pistachios
4 T honey

Slice the peaches and apricots in about 3/8-inch slices. (I don’t peel them.)

Sprinkle the powdered almonds on the bottom of the tart shell.

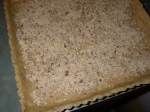
Pulverized almonds sprinkled on the tart dough

Pulverized almonds sprinkled on the tart dough

Arrange the sliced fruit in the shell.
Sprinkle the pistachios over the fruit.
Drizzle the honey over everything. (I just drizzled right out of the bottle; I have no idea if I used 4 tablespoons.)

Peach and apricot tart ready for the oven

Peach and apricot tart ready for the oven

Bake for 35 to 40 minutes, until the crust has browned.

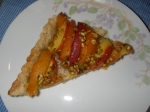
A slice of tart

A slice of tart

Leave a comment

Filed under tart

Eggs Benedict

Okay, technically this isn’t baking, but breakfast is my favorite meal, and I don’t mind cooking for it.
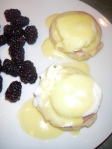
Eggs Benedict with a side of blackberries

Eggs Benedict with a side of blackberries


Today I tried yet another English muffin recipe, this one from The Professional Pastry Chef. This one is dough more than batter, and I didn’t like it very much. On the other hand, I feel like I’m getting the hang of using the stove-top griddle, so that’s good. I think the best muffin recipe so far is Ciril Hitz’s, which I’ll try on the griddle next time. Ciril wants you to bake his muffins in the oven.

The part of eggs Benedict that everyone worries about is the hollandaise sauce. I’ve only ever made it from Mastering the Art of French Cooking, and it’s always turned out perfectly. Julia’s instructions are excellent, and if you follow them and pay attention, it’s easy.

Hollandaise Sauce
(from Mastering the Art of French Cooking)
Makes 1 to 1½ cups, enough for 4 to 6 servings
3 egg yolks
1 T cold water
1 T lemon juice
big pinch of salt
2 T cold butter cut in half (2 1-T pieces of cold butter)
6 to 8 oz butter (1½ to 2 sticks), melted
salt and white pepper to taste
a few drops of lemon juice to taste

To melt the butter, I cut it up into a big measuring cup (you have to pour it into the sauce later) and microwave it until it’s all melted. What works for me is 30 seconds on medium high, stir, repeat twice. Do that first and set it aside. When you’re ready for the melted butter, you want it to be warm but not hot.

Separate the eggs and put the yolks into a small, heavy-bottomed saucepan. (You can use a double boiler, but I never have.) Beat the yolks with a wire whip for a couple of minutes until they’re thick and sticky. Add the water, lemon juice, and salt and beat for another 30 seconds.

Put 1 tablespoon of the cold butter into the saucepan with the yolks. Put the pan on the stove over very low heat and, using the wire whip, stir the yolks and butter until you have a thick homogeneous mixture. This takes me about 2 minutes. You know you’re there “when you can begin to see the bottom of the pan between strokes, and the mixture forms a light cream on the wires of the whip.”

Remove the pan from the heat. Seriously, take it totally off the stove; you’re done using the stove for the sauce now. Whisk in the other tablespoon of cold butter. This will cool the yolks and stop the cooking.

Whisking the sauce constantly, pour in the melted butter “by droplets” until the sauce begins to thicken, at which point you can pour the butter in a thin stream. When you’re down to the milk solids at the bottom, stop.

Season with salt and white pepper and a little lemon juice to taste.

Eggs Benedict
For each person:
1 English muffin, split
2 slices of cooked Canadian-style bacon
2 poached eggs
Hollandaise sauce

You can have everything ready but the eggs and start assembling the servings while the eggs poach.

Lay the halves of English muffin on a plate, crumb up.
Place one slice of Canadian bacon on each muffin half.
When the eggs are done, remove each one from the water and lay it on the Canadian bacon.
Pour Hollandaise sauce over the eggs.

Reference
Sauce Hollandaise. In Julia Child, Simone Beck, Louisette Bertholle: Mastering the Art of French Cooking (vol. 1). New York, Alfred A. Knopf, 1962, p. 79.

Leave a comment

Filed under breakfast

Tomato Tart

Everyone seems to be making (and blogging about) tomato tarts these days. They all sound good, and I figured I’d follow one of the recipes, but then I realized I liked certain aspects of each one, so I took a stab at my own. Well, you know, the first one is the experiment. I’ll make another one, but I’ll do a few things differently.

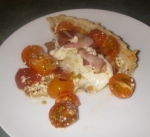
A slice of experimental tomato tart

A slice of experimental tomato tart

I wanted to use up some leftover pie crust, and I was thinking an Alsatian onion tart would do that, but tomato tart would also work. I got some heirloom cherry tomatoes at Trader Joe’s yesterday (TJ’s calls them “mini heirloom tomatoes”) specifically to use in a tart. Dr. Science doesn’t like goat cheese, so I got some Salvadoran soft white cheese. I got bacon for the Alsatian onion tart, but there’s no reason not to use bacon in a tomato tart, so I figured I’d try some of that, too. We have grainy mustard, but not enough to really coat the bottom of the tart shell, so I thought I’d mix that with a little Greek-style yogurt.

Both of the recipes I liked baked the tart with raw dough, not with a blind-baked crust. This was one thing I think didn’t quite work here. The crust baked okay, but it would’ve been better if I’d blind baked it for 20 minutes and then filled it. Another thing is the tomatoes, which were probably too juicy for this, and for the next one I’ll drain the tomatoes before I put them in the crust. I also thought bacon would be a nice addition (because bacon is always a nice addition), and I didn’t cook it first, but next time I will a little.

So here’s what I’ll do next time:

Heirloom Tomato Tart
10-11 oz pâte brisée or other dough for a 9-inch (24-cm) tart
1 lb heirloom cherry tomatoes
2-3 oz bacon (3 or 4 strips)
¼ cup Greek-style yogurt
1 T grainy mustard
1-2 oz goat cheese or other soft white cheese
salt, pepper, and fresh herbs (e.g., basil, oregano) to taste

Roll out the tart dough, fit it into the tart pan, and trim the dough.

Short dough in a 9-inch (24-cm) tart pan

Short dough in a 9-inch (24-cm) tart pan

Line the dough with foil and weight it.
Put the shell in the freezer while the oven preheats.

Preheat the oven to 375℉.

When the oven is preheated, put the tart shell in to bake for 20 minutes. Remove the tart shell from the oven, remove the foil and weights from the shell. Leave the shell in the tart pan. Let the shell cool while you prepare the filling ingredients.

Halve the tomatoes and set them in a colander to drain.

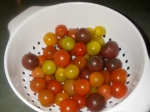
Aren't those pretty? Next time, I'll slice them and let them drain awhile.

Aren't those pretty? Next time, I'll slice them and let them drain awhile.

Cut the bacon strips into ¼-inch pieces. Line a plate with parchment paper or a paper towel, distribute the bacon pieces over the paper , and top with a paper towel. Microwave on high for 1½ minutes (or fry the bacon until it’s cooked about halfway).
Mix the yogurt and mustard in a small bowl.

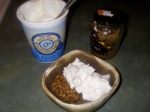
Grainy mustard and Greek-style yogurt

Grainy mustard and Greek-style yogurt

Spread the yogurt mixture on the bottom of the tart shell.
Sprinkle salt, pepper, and fresh herbs over the yogurt mixture.
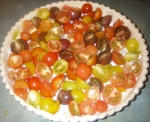
Arrange the tomato halves over the yogurt mixture.

Halved tomatoes arranged over the yogurt-mustard mixture

Halved tomatoes arranged over the yogurt-mustard mixture

Distribute the bacon pieces over the tomatoes.

Bake the tart for 20 minutes. While that’s going on, slice the cheese.
Remove the tart from the oven, arrange the cheese slices over it, and return it to the oven for another 5-8 minutes, until the cheese is melted.

Leave a comment

Filed under pie

Breakfast Pastries

Okay, I made the Eccles cakes, but those are made with preserved fruit, which is for winter. It’s June; we have beautiful fresh fruit. So just for fun, this morning I made a few little breakfast pastries with (most of) the rest of the quick puff pastry. I totally need practice with forming the pastries. It’s a strain on all of us, but we’ll manage somehow.

One trick to baking with laminated dough is making sure the edges are free to puff. You do that by slicing off the folded edges. That leaves some waste dough that you really can’t use for pastries. The whole point of laminated dough is the layers, and you obviously won’t be getting the layers if you just mash the leftovers together and reroll them. You can use them for cheese straws; Ciril Hitz likes to chop up the leftover pieces, mix them with other ingredients, then divide that among muffin cups and bake it. Actually, you can mash them up and reroll them and use that as a base for Alsatian onion tart, and I might do that with these leftovers. Anyway . . .

I only made a very small batch of quick puff pastry the other day, so I don’t have a lot to work with. There are only two of us, though, so I don’t need a lot to work with. First I rolled out the pastry to what I thought was a good thickness (about ¼ inch):

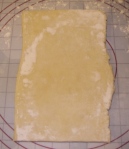
Quick puff pastry rolled out

Quick puff pastry rolled out

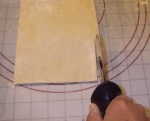
Then I sliced off the edges using a pizza cutter:

Slicing off the folded edges with a pizza cutter

Slicing off the folded edges with a pizza cutter

Then, using the pizza cutter again, I cut the sheet into what I though were appropriate sizes for the pastries I wanted to make. This is one of the things I need to work on.

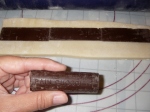
One thing we did in the class with Ciril Hitz was make little petits pains au chocolat. No, that’s not redundant; we made smaller ones than the standard size, and that’s what I did here. For the standard size, you use a 4″ x 6″ piece of pastry; you lay a stick of chocolate on the pastry, fold the pastry over it, lay another stick of chocolate, then finish rolling the pastry. Chef Ciril’s method is to have a long strip of pastry on which you lay a row of chocolate sticks. That makes much smaller petits pains. The chocolate sticks are made especially for this:

See, says right there: "Pain Chocolat"

I wrapped the dough around the chocolate, then I just cut the strip into pieces the length of chocolate sticks and slashed the tops.

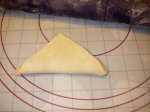
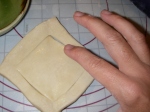
I cut the rest of the dough into squares to make little fruit pastries. Fold the square in half diagonally:

Square of pastry folded in half

Square of pastry folded in half

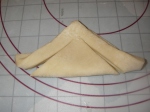
Then, using a sharp knife, cut borders, but not all the way to the end; you want to leave the center attached to the border at the point:

Borders cut into the pastry

Borders cut into the pastry

Now open the square and apply a little egg white to the edges of the center. I use the egg white that comes in a carton and just pour a little into a small dish:

Applying a little egg white, which will act as glue

Applying a little egg white, which will act as glue

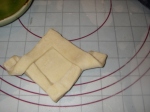
Then you fold the borders over and press them gently so they stick to the egg white:

Folded pastry

Folded pastry

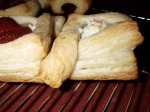
You don’t have to dock the center of the pastry if you fill it; the filling will hold that down and keep it from puffing. The border will puff up all around and make a little container for the filling. I didn’t cut the first one very well, so I didn’t put fruit in that. As a base for the fruit, I mixed up a little cream cheese (about a tablespoon) with a little granulated sugar (about a teaspoon). I put a blob in the center of each pastry and spread it out. Then I cut a couple of strawberries and put them on the cream cheese filling. All the pastries baked at 375℉ for 20 minutes:

These will be better with practice!

These will be better with practice!

And remember that this is quick puff pastry, not the real thing; but look at the layers!

Layers of quick puff pastry

Layers of quick puff pastry

They’re pretty tasty, too. I’ll have to keep practicing so they look as good as they taste.

Leave a comment

Filed under breakfast, pastry

Golden Syrup

One ingredient I sometimes see in English recipes is golden syrup. I’m told corn syrup is an acceptable substitute, but it’s always nice to have the ingredient the recipe calls for.

This afternoon when I was in the Star Market at Porter Square, I happened to notice it. I don’t like the Star Market; everything’s overpriced, and they mustn’t treat the staff very well because the staff turnover is pretty rapid. However, they have a good ethnic food aisle, which includes a British section, and that’s where I saw the golden syrup:

Lyle's Golden Syrup

Lyle's Golden Syrup


Now I just need a recipe that uses it. I’ll bet Michele has one.

3 Comments

Filed under ingredients

Welcome to the 21st Century

This evening I made a banana cream pie. I still get a little thrill seeing the blind-baked pie crust. The pastry cream looked good. I had enough bananas, and I had three egg whites left over from the lemon curd I made on Sunday. I spooned some pastry cream into the crust and sliced the bananas onto it. It looked pretty. I got out the camera and turned it on. The camera said, “Battery depleted.”

There was a time not too long ago that cameras used film and you always had to be thinking ahead. You had to think about how you were using your film and if you had enough.Then you couldn’t see the pictures until the film was developed. That was pretty fast with a Polaroid, but it could be months with conventional film. I have photos from when I was kid that were taken on Christmas and stamped June of the next year. I’ve been taking this instant photo thing a little for granted. I don’t have to make sure I have enough film, but I have to make sure I have enough battery. Welcome to the 21st century.

I’ll take a photo tomorrow when the pie is sliced.

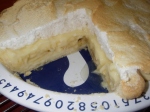
Update: Dr. Science sliced himself some pie to take to work and said, “Now you can take a picture of the crumb.” (We both know pie doesn’t have a crumb, but I like the concept.)

Banana cream pie: the crumb view

Banana cream pie: the crumb view

Leave a comment

Filed under pie

Quick Puff Pastry

I actually know how to make puff pastry. It’s not hard, but it’s time consuming: You work with the pastry for a little while, then it goes in the fridge to rest and chill, then you do it all again. Depending on how you time everything, it typically takes three days start to finish. There’s a quicker way, though, that’s almost as good: quick puff pastry, also called blitz puff pastry or rough puff pastry. This is basically extra-buttery flaky pie crust that you fold like puff pastry to get layers of flaky goodness. Chef Bo, who’s Swedish originally, says “In Europe, this type of dough is known as American puff pastry . . . because this method resembles the technique used to make pie dough, and in Europe pies are synonymous with America.”

Quick Puff Pastry
(from The Professional Pastry Chef)
20 oz bread flour
20 oz butter (2½ sticks)
1 T table salt (or 2 T Diamond Crystal kosher salt)
6 oz ice water

Add the salt to the cold water and put that in the freezer. Cut the fat into chunks (I slice it into tablespoons)

Equal amounts of flour and butter by weight

Equal amounts of flour and butter by weight


and work it into the flour either with a pastry blender or your fingers. Don’t break up the chunks of butter too much; you want them to stay big. Stir in the ice water until the pastry forms lumps. It will look shaggy and hopeless at this point:
Shaggy, rough pastry

Shaggy, rough pastry


Dump it onto a well-floured work surface (this is where the teachers at King Arthur say, “Flour is your friend here.”) and give it a few kneads. It will come together:
Quick puff pastry dough

Quick puff pastry dough


Let the dough rest for 10 minutes (I put it in the fridge, but Chef Bo says you don’t need to unless your kitchen is warm).

Turning the Pastry
You fold laminated dough to get the layers (to laminate it). The set of steps that includes folding is called a turn.

    Roll the dough into a rectangle about ½ inch thick. Traditionally you roll it in a portrait orientation (with the longer edges on the sides and the shorter edges at the top and bottom).
    Fold the dough as if you’re folding a letter: Fold the top third down and the bottom third up over that.
    Turn the dough clockwise 90 degrees so the closed edge is on your left (oriented like a book).
    Flip the dough over vertically so the seam is on the bottom and the closed edge is still on your left.

That’s one turn. Do the whole thing again.

Traditionally, you let the dough rest in the refrigerator between turns. I put this in the fridge at this point to chill and rest, but Chef Bo says you don’t have to.

Do one more turn.

Now do a double turn:

    Instead of folding the dough in thirds like a letter, fold the top and bottom so they meet in the middle.
    Fold the dough in half again as if you’re closing a book.

You can wrap the dough and put it in the fridge to use later, or you can use it right away.

I used a portion of this for the Eccles cakes yesterday, but I’ll use the rest for turnovers or little pastries. It was sort of wasted on the Eccles cakes because forming the astries that way doesn’t really allow the dough to puff. It was very flaky, though, and delicious.

Leave a comment

Filed under pastry

Eccles Cakes

Eccles cakes are yet another exotic English treat recommended by our friends Dave and Michele. They sounded good to me, but I’m ambivalent about making them now because these are little pastries filled with currants and candied peel, but that’s winter food, and it’s summer. We have beautiful fresh fruit; why bake with preserved fruit? I guess the answer is “Because Michele suggested it.”

The recipe Michele sent calls for “flaky pastry,” which apparently can be flaky pie crust, puff pastry, or something in between. I used something in between, quick puff pastry (also called rough puff pastry or blitz puff pastry). This is a lot like flaky pie crust except it has a lot more butter: You use equal weights of flour and butter, and you use less water than I normally do for flaky pie crust. You roll and fold the dough just as you do for regular puff pastry, and it doesn’t puff so dramatically as puff pastry, but it does puff and it’s very flaky.

Eccles Cakes

Preheat the oven to 220℃ (425℉)
Have chilled and ready: 500 g flaky pastry (a batch of flaky pie crust dough for a double crust pie will do nicely)
Ingredients:
25 g melted butter
100 g sugar
50 g candied peel
200 g currants
Nutmeg

25 g butter and 100 g sugar

25 g butter and 100 g sugar


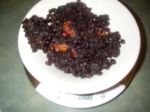
50 g candied peel and 200 g currants

50 g candied peel and 200 g currants


Method:

1. In a medium saucepan, combine the sugar and butter and cook over a medium heat until melted

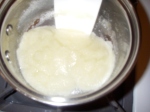
The butter is melted, but the sugar isn't, which I hope is right

The butter is melted, but the sugar isn't, which I hope is right


2. Off the heat, add currants, candied peel, nutmeg and allspice
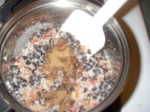
Currants, peel, allspice, and nutmeg added to butter and sugar

Currants, peel, allspice, and nutmeg added to butter and sugar


3. On a lightly-floured surface, roll the pastry thinly and cut into rounds of about 0.5 cm thickness and 10 cm diameter
4. Place a small spoonful of filling onto centre of each pastry circle
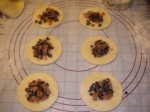
Pastry circles with a spoonful of fruit mixture

Pastry circles with a spoonful of fruit mixture


5. Dampen the edges of the pastry and draw the edges together over the fruit and pinch to seal
Pastries pinched closed

Pastries pinched closed


6. Turn over, then press gently with a rolling pin to flatten the cakes
Pastries turned over and flattened

Pastries turned over and flattened


7. Flatten and snip a V in the top with scissors. Place on a baking tray
8. Brush with water and sprinkle with a little extra sugar
9. Bake in a hot oven for 20 minutes (220°C) or until lightly browned round the edges
10. Place on a wire rack and allow to cool.
An Eccles cake, baked and ready to eat

An Eccles cake, baked and ready to eat

I found a few points in this recipe that could be improved editorially. The ingredients list says “melted butter,” but you cook the butter and sugar over medium heat until melted. Am I melting the sugar, then? I didn’t melt the butter first, and what I ended up with wasn’t liquid: The butter melted, but the sugar stayed granular. I decided that was okay and went with it. The ingredients list says “nutmeg,” but the directions say “nutmeg and allspice,” and nowhere does the recipe say how much. I used ½ tsp of each just to cover my bases. As for how much filling to use in each pastry, I’m not sure how much a “small spoonful” is; I went with about half a tablespoon.

These were pretty tasty, and I’ll definitely make them again in the cold weather.

2 Comments

Filed under pastry